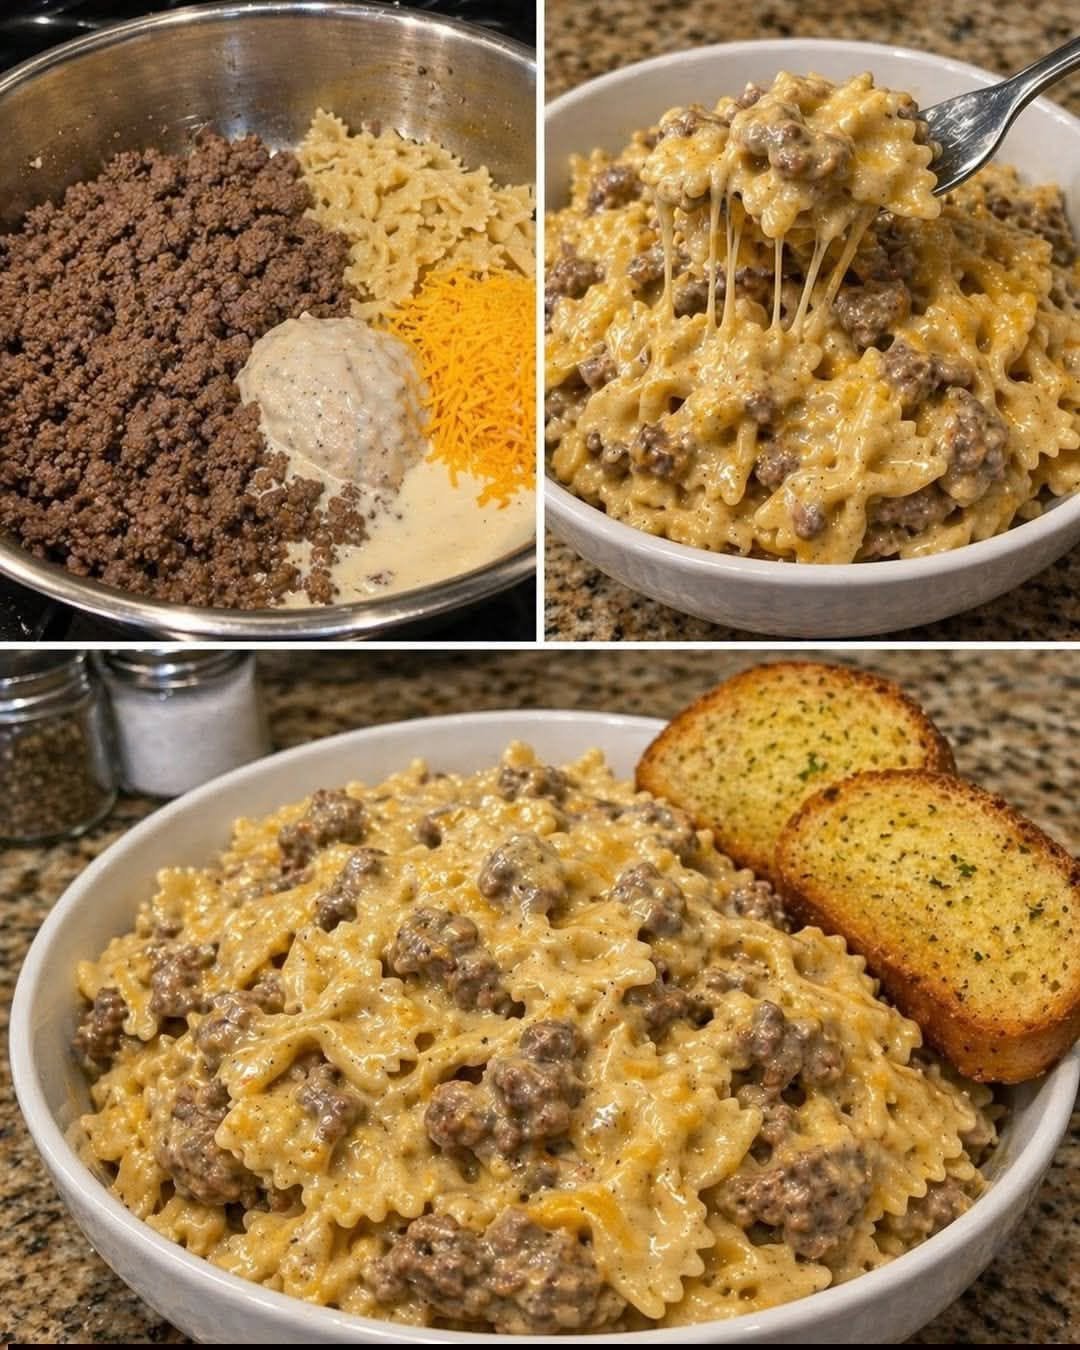
Step-by-Step Instructions
Step 1 — Cook the Aromatics
Heat a large Dutch oven (5 to 6-quart) over medium heat and add the olive oil. When the oil shimmers, add the diced onion and cook, stirring occasionally, for 3 to 4 minutes until softened and beginning to turn translucent. Add the minced garlic and cook for 30 seconds, stirring constantly, just until fragrant — garlic burns quickly in a hot pan and needs only this brief cook time before the beef is added to protect it from over-browning.
Step 2 — Brown the Beef
Add the ground beef to the Dutch oven along with the salt and black pepper. Break the meat into small crumbles as it cooks, using a wooden spoon or spatula. Cook for 5 to 7 minutes, stirring and breaking up the beef regularly, until it’s fully browned with no pink remaining and there’s visible browning and some darker spots where the meat has had direct contact with the hot pan surface — these browned spots develop the Maillard reaction flavors that give the finished sauce its savory depth. Once browned, tilt the Dutch oven and carefully spoon off most of the rendered fat, leaving a thin layer behind.
Step 3 — Add the Pasta
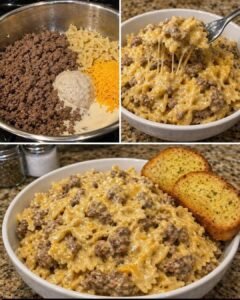
Turn off the heat under the Dutch oven momentarily. Pour the dry, uncooked pasta shells directly over the browned beef and onion mixture, spreading them into a relatively even layer on top of the meat. Do not stir at this point — keeping the pasta mostly on top of the beef layer ensures the creamy liquid you’re about to add can permeate down through the shells and coat them from above as it heats, rather than the shells being buried in the beef before the liquid reaches them.
Step 4 — Prepare the Creamy Sauce Liquid
In a large measuring cup or bowl, whisk together the beef broth, heavy cream, tomato paste, and Italian seasoning until the tomato paste is fully dissolved and the mixture is smooth and uniform — no streaks of tomato paste remaining. Whisk in one cup of the shredded sharp cheddar and stir until it begins to melt into the warm liquid mixture. Add the red pepper flakes if using. This combined liquid is what transforms as it cooks from a pourable mixture to the creamy, coating sauce of the finished dish.
Step 5 — Add the Liquid and Simmer
Return the Dutch oven to medium heat. Slowly pour the creamy liquid mixture evenly over the pasta shells and beef, distributing it as widely as possible across the surface of the pan. Use the back of a spoon to gently press any shells that are sitting above the liquid level down into the liquid, ensuring maximum coverage, but avoid vigorous stirring that would break the layering unnecessarily. Bring just to a gentle simmer, then reduce the heat to low, cover the Dutch oven with a lid, and cook for 15 to 18 minutes. Stir once or twice during cooking, gently turning the mixture from the edges toward the center to prevent sticking at the base of the pot, until the pasta shells are tender throughout and most of the liquid has thickened into a creamy sauce around the beef and pasta.
Step 6 — Adjust Consistency and Finish
Remove the lid and check the sauce consistency. If it seems too thick — not coating the shells loosely but almost binding them together — stir in a splash of beef broth or water a tablespoon at a time until it loosens to a creamy, saucy consistency. If it seems too thin, simmer uncovered for 2 to 3 minutes, stirring frequently, to reduce slightly. Turn off the heat completely and stir in the remaining half cup of shredded cheddar, working it through the sauce until fully melted and the texture is velvety and smooth. Taste and adjust seasoning with additional salt and pepper as needed.
Step 7 — Rest and Serve
Allow the dish to rest for 3 to 5 minutes with the lid slightly ajar before serving. This brief rest allows the sauce to thicken and cling more firmly to the pasta shells — the dish served immediately after finishing is slightly looser than the dish served after a few minutes of resting. Scatter Parmesan and chopped fresh parsley over the top if desired, and serve directly from the Dutch oven.
Tips for the Best Results
Brown the beef properly. The difference between properly browned beef and grey, steamed beef in the finished dish is significant in a recipe where the beef’s flavor has to carry through a cream and tomato sauce. Allow the beef to make sustained contact with the hot Dutch oven surface rather than stirring constantly, and look for actual brown coloring rather than just cooked-through grey color.
Don’t skip the cheese-in-the-liquid step. Adding a cup of shredded cheddar to the liquid mixture before it goes into the pot distributes cheese flavor throughout the sauce from the beginning of the cook rather than only at the end. The second addition of cheese at the end finishes the sauce with a fresh, smooth cheese quality. Both additions are important to the finished dish’s cheese flavor and texture.
Keep it at a gentle simmer. A rolling boil during the pasta cook can cause the cream to break and the sauce to become grainy rather than smooth. Once the mixture comes to a simmer, reduce the heat to low and keep it there for the duration of the pasta cook — a gentle, occasional bubble is what you want to see.
Check the pasta at 15 minutes. Pasta cooking time in a covered pot with cream sauce varies depending on the Dutch oven’s heat distribution and the exact simmer level. Start checking at 15 minutes by tasting a shell — it should be tender throughout with a slight remaining chew. A shell that’s still crunchy in the center needs more time; a shell that’s uniformly soft with no bite is overcooked.
Add the finishing cheese off the heat. Stirring the final half cup of shredded cheddar into the sauce over active heat can cause the cheese to seize and turn grainy rather than melting smoothly. Turn off the heat completely before adding the finishing cheese and stir it in gradually — the residual heat of the sauce and pot is sufficient to melt it into a smooth, glossy finish.
Frequently Asked Questions
Can I use a different type of pasta?
Yes. Any medium pasta shape that cooks in roughly 12 to 15 minutes at a low simmer works well. Penne rigate, rotini, cavatappi, and elbow macaroni are all good alternatives. Avoid very small pasta shapes (orzo, ditalini) that cook too quickly and become overcooked before the sauce has developed, and very large pasta shapes (rigatoni, large shells) that need more cooking time and more liquid than the recipe provides.
Can I use ground turkey or chicken instead of beef?
Yes. Ground turkey or chicken produces a lighter, milder result. Because these meats have less fat than ground beef, add an extra tablespoon of olive oil before browning to prevent sticking, and season more assertively since their natural flavor is more neutral than beef. The finished dish will be less robustly savory but still very good. Using chicken broth instead of beef broth alongside the meat change produces a more cohesive flavor combination with poultry.
Can I add vegetables?
Yes. Diced bell pepper added with the onion at the beginning of the cook softens completely and adds sweetness and color. Frozen peas or frozen mixed vegetables stirred into the dish in the final 5 minutes of cooking warm through completely and add nutrition without requiring separate preparation. Baby spinach stirred in after the heat is off wilts in the residual warmth of the dish in about 30 seconds and adds color and nutrition without changing the dish’s character noticeably.
Can I make this ahead?
Yes, with some adjustment. The dish reheats well but thickens considerably in the refrigerator as the pasta continues to absorb the sauce. When reheating, add a splash of beef broth or cream (two to three tablespoons per serving) and stir to restore the sauce to its original creamy consistency. Reheat on the stovetop over medium-low heat, stirring frequently, or in the microwave in short bursts. The dish keeps in the refrigerator for up to 4 days.
Can I freeze this dish?
Not ideally. Cream-based pasta dishes don’t freeze particularly well — the cream sauce tends to separate and the pasta becomes soft and overcooked after thawing. It’s better made fresh or stored in the refrigerator for a few days than frozen. If you want to freeze a beef and pasta dish for future use, freeze the beef and sauce separately from the pasta (which can be cooked fresh when reheating).
Variations Worth Trying
Bacon and beef version: Cook three strips of diced bacon in the Dutch oven before adding the olive oil and onion. Remove the bacon and set aside; cook the dish as directed using some of the rendered bacon fat in place of the olive oil. Stir the crumbled bacon back in along with the finishing cheese. The bacon adds a smoky, salty depth that plays well against the cream and tomato flavors.
Mushroom and beef version: Add 8 ounces of sliced cremini mushrooms to the Dutch oven after the onions have softened, cooking them for 4 to 5 minutes until they’ve released their liquid and begun to brown before adding the beef. The mushrooms contribute an earthy, umami-rich depth to the sauce that makes the finished dish taste more complex and satisfying.
Spicy arrabbiata version: Increase the crushed red pepper flakes to half a teaspoon and add a teaspoon of chili powder to the beef as it browns. Substitute pepper jack for some of the cheddar. The heat builds gradually through the dish and produces a version with a warm, assertive spice that contrasts pleasantly with the creaminess of the sauce.
Four-cheese version: Replace the cheddar with a blend of one-third cup each of sharp cheddar, mozzarella, and Parmesan, with the remaining Parmesan used as a finishing garnish. The three-cheese combination produces a more complex, Italian-inspired cheese flavor throughout the sauce and a more stretchy, melty quality from the mozzarella.
Lighter version: Replace the heavy cream with a combination of one cup of half-and-half and half a cup of whole milk. Reduce the cheese to one cup total (three-quarters in the sauce, one-quarter at the end). The finished dish is noticeably lighter in richness and calories but still very satisfying — a good option for households that want the dish’s flavor profile with less richness.
Serving Suggestions
Creamy Beef and Shells is a complete, filling main course on its own. A simple green salad dressed with a sharp vinaigrette — something acidic and bright — is the most important accompaniment, providing the freshness and contrast that the rich, creamy pasta needs alongside it. Garlic bread or warm dinner rolls are excellent for the extra sauce that pools around the pasta in the bowl. For a more complete table, roasted broccoli or sautéed green beans alongside add a vegetable element and a slightly bitter counterpoint to the dish’s creaminess. The dish is best served directly from the Dutch oven, which keeps it warm through the meal and is an attractive, casual presentation that suits its character as a weeknight comfort dish.
Storage
Store leftover beef and shells in an airtight container in the refrigerator for up to 4 days. The pasta will absorb more sauce during storage and the dish will be noticeably thicker and denser when cold. Add two to three tablespoons of beef broth or cream when reheating to restore the creamy, saucy consistency. Reheat on the stovetop over medium-low heat, stirring frequently, or in the microwave at medium power, stirring once or twice during heating. Season with a pinch of salt and pepper after reheating since the flavors will have mellowed during storage.
One Pot, Thirty Minutes, Genuinely Satisfying
Creamy One-Pot Beef and Shells is the weeknight dinner that proves the one-pot method at its best: a single Dutch oven, a straightforward technique, and a result that tastes more developed and satisfying than the thirty minutes and one pot it required to produce. The pasta cooked in the cream and broth rather than in plain water, the beef browned for actual flavor rather than just safety, the cheese in two stages for maximum impact — these are small decisions that add up to a finished dish people come back to. That’s what makes a weeknight recipe worth keeping.
Enjoy!